When Droid Division released their 3D model of LO-LA from the Obi-Wan series last year, I immediately knew I wanted to build a night light for my kids. The following video shows how I did it.
(Note: This is a slightly modified excerpt of Chapter 1 from a book I’ve been working on entitled “Digital Audio for C++ Programmers.”)
The decibel is perhaps one of the most confusing and misunderstood topics in audio. It has a confusing formula that appears to change based on the context. It’s also used in a variety of applications beyond audio. In fact, much of the documentation you’ll find is actually related electronics and telecommunications. And to muddy things even more, by itself the plain ole decibel doesn’t even really convey much meaning. It merely relates one power value to another. So, if after reading this article, you still find decibels confusing, don’t fret. You’re in good company.
The decibel originated with telephony in the early 1900’s. It was used as a way to describe the power efficiency of phone and telegraph transmission systems. It was formally defined as 1/10th of something called a bel. Interestingly, the bel was rarely used. The decibel got all the glory. The decibel has since found its way into all sorts of other domains, such as optics, electronics, digital imaging, and, most importantly to me, audio.
There are two benefits to using the decibel. The first is that switching to a logarithmic scale converts an awkward range of values (e.g., 0.0002 Pascals – 20 Pascals) to something much easier to reason about (e.g., 0 dB SPL – 120 dB SPL) . The other benefit applies to audio – a logarithmic scale is much closer to how the human ear actually hears. With a linear scale, like Pascals, doubling the value doesn’t usually feel like a doubling of loudness. With decibels, we actually get a scale that’s much closer to how to perceive loudness.
The decibel, in the generic sense, is not strictly a physical unit. When we think of physical units, we typically think about things like Amperes (number of moving electrons over time), Pascals (pressure), meters (distance), Celsius (temperature), etc. These are absolute units that correspond to physical things. The decibel isn’t like that. It’s a relative unit. It provides a relation of two things, which are themselves physical units. And it does this on a logarithmic scale.
The general formula for the decibel is as follows.
The decibel, abbreviated dB, is the logarithmic ratio between two power values. One of these two values is a reference value. The other is a measured value.
You may notice the phrase “power value” in that formula. In physics, this means the amount of energy transferred over time. The unit for power is usually the watt. However, there are plenty of units used that aren’t power values (such as Pascals in acoustic audio). So we have to convert those units into something related to power. This typically just means squaring the measured and reference values. The decibel formula ends up looking like so.
With logarithms, we can pull that exponent out and turn it into a multiplication.
This can be simplified even further like so.
And this is the formula you’ll most likely encounter when applying the decibel to measured and reference units which aren’t power-based (like Pascals in acoustic audio). It’s just a derivation of the original formula with the measured and reference values tweaked.
Standard Reference Values
A lot of domains, such as electronics and audio, have standardized reference values for the various things being measured. When we talk about these standardized flavors of the decibel, we add suffixes to the dB abbreviation. Examples of this are dBV (voltage based), dBm (radio power), dBZ (radar power), etc. The one we’re most concerned with in the field of acoustic audio is dB SPL.
dB SPL
dB SPL is the most common flavor of decibel for indicating the loudness of acoustic audio. SPL stands for sound pressure level. The reference value used in calculating dB SPL is the threshold of human hearing – 0.000020 Pa. We plug this into the decibel formula along with a measured value, also in Pascals, to come up with a dB SPL value.
A measurement of 0 dB SPL is considered the threshold of human hearing. That is, it’s the quietest sound that the human ear is capable of hearing. On the upper end of the scale, somewhere between 130 dB SPL and 140 dB SPL, is what’s referred to as the threshold of pain. When the volume of sound approaches this level, it can result in physical discomfort and some amount of hearing loss is almost certain.
The following two tables shows some common sounds and their approximate sound pressure measurements. The first table shows measurements in Pascals. The second table shows them in dB SPL. Compare them and you’ll see that dB SPL is much less awkward to use.
Sound Source
Distance from Ear
Pascals
Jet Engine
1 meter
632
Threshold of Pain
At ear
20 – 200
Yelling Human Voice
1 inch
110
Instantaneous Hearing Loss Can Occur
At ear
20
Jet Engine
100 meters
6.32 – 200
Chainsaw
1 meter
6.32
Traffic on a Busy Road
10 meters
0.2 – 0.63
Hearing Loss from Prolonged Exposure
At ear
0.36
Typical Passenger Car
10 meters
0.02 – 0.2
Television (typical volume)
1 meter
0.02
Normal Conversation
1 meter
0.002 – 0.02
Calm Room
Ambient
0.0002 – 0.0006
Leaf rustling
Ambient
0.00006
Threshold of Hearing
At ear
0.00002
Sound Pressure Measured in Pascals, “Sound pressure” Wikipedia: The Free Encyclopedia. Wikimedia Foundation, Inc, 22 July 2004, https://en.wikipedia.org/w/index.php?title=Sound_pressure&oldid=1112496481. Accessed 29 Nov. 2022.
Sound Source
Distance from Ear
dB SPL
Jet Engine
1 meter
150
Threshold of Pain
At ear
130-140
Yelling Human Voice
1 inch
135
Instantaneous Hearing Loss Can Occur
At ear
120
Jet Engine
100 meters
110-140
Chainsaw
1 meter
110
Traffic on a Busy Road
10 meters
80-90
Hearing Loss from Prolonged Exposure
At ear
85
Typical Passenger Car
10 meters
60-80
Television (typical volume)
1 meter
60
Normal Conversation
1 meter
40-60
Calm Room
Ambient
20-30
Leaf rustling
Ambient
10
Threshold of Hearing
At ear
0
Sound Pressure Measured in dB SPL, “Sound pressure” Wikipedia: The Free Encyclopedia. Wikimedia Foundation, Inc, 22 July 2004, https://en.wikipedia.org/w/index.php?title=Sound_pressure&oldid=1112496481. Accessed 29 Nov. 2022.
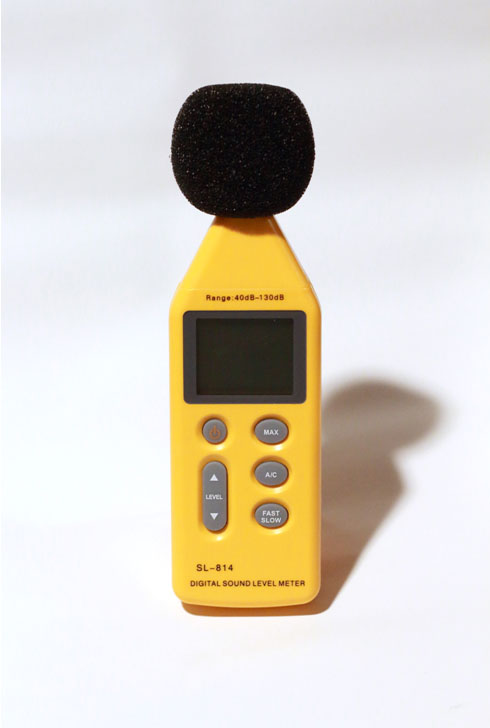
There are instruments available that measure sound pressure levels and report dB SPL. One such instrument is shown below. This happens to be my personal db SPL meter.
These devices are fun to take to concerts or demolition derbys if for no other reason than giving you the intellectual authority to complain about permanantly damaged hearing.
Conclusion
Hopefully, this article has helped demystify the decibel. Mathematically, they’re not something to be feared. It’s usually the logarithms that scare folks away. And if you’ve long since forgotten how logarithms work, go brush up on them and come back to this article a second time. It will make a lot more sense.
If you found this content useful, or if something could have been explained better, please leave me a comment below.
In the first article of this series, I spent some time looking at the DFPlayer – a small, affordable MP3 playback device. I demonstrated how it can be connected to an Arduino and driven over a serial connection. In the second article of the series, I looked at RC radio controllers and how they can also be used in an Arduino project. In this final article, I’m going to be combining the concepts from the previous articles to construct a sound board that allows me to trigger audio playback through a radio controller. This will provide an audio solution for a robotics project that my daughter and I worked on together a few months ago.
There’s not a whole lot of theory here. I’m going to assume that you’ve read the previous two articles. If something is confusing, or if it seems like I skipped over an explanation, please go check out Digital Audio With the DFPlayer and Radio Controllers With Arduino. If something still seems missing, please reach out to me and I’ll fix it.
Physical Construction
Let’s start by seeing how I wired everything together. Below is a quick layout I did with Fritzing.
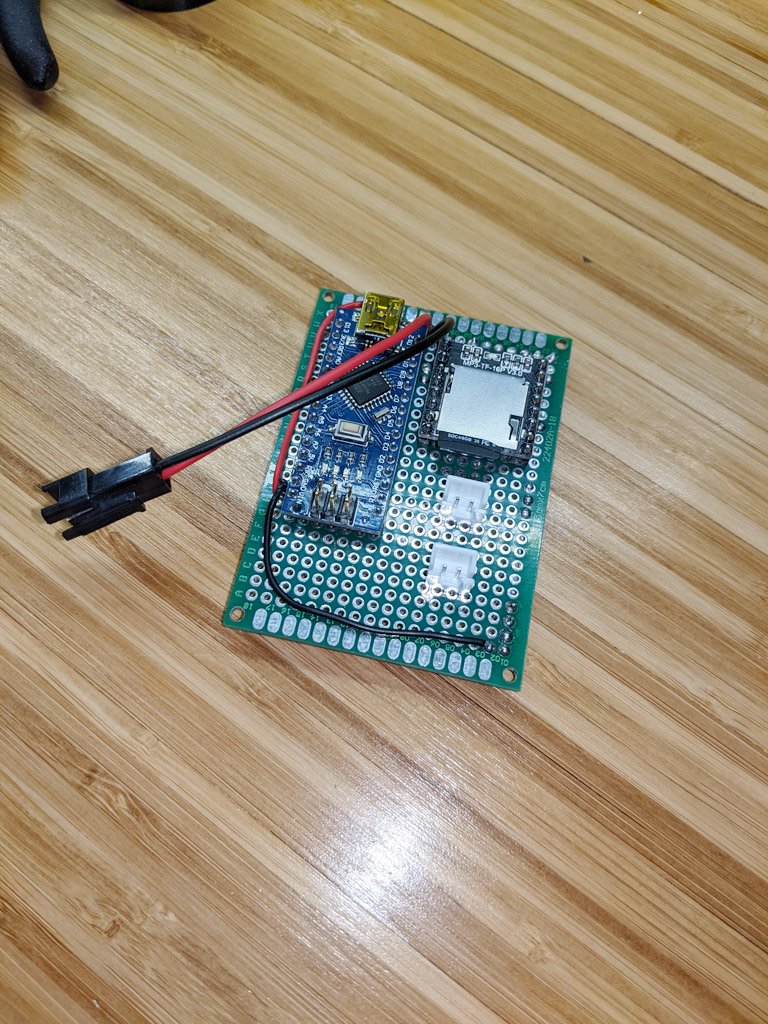
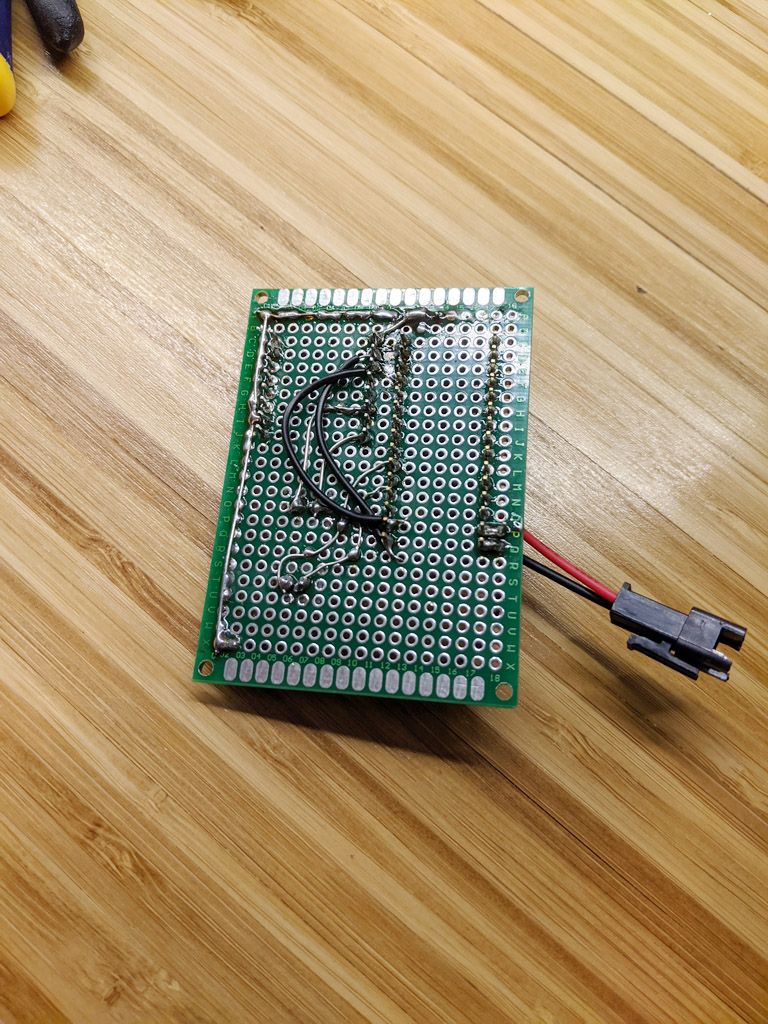
And here is what the actual board looked like when I was finished.
The biggest component on the board is an Arduino Nano. Next to the Nano is the DFPlayer. Soldered to the top of the board is a connector for power. And beneath the DFPlayer are two 2-pin JST connectors. One of the JST connectors is for the speaker and the other is for the PWM data from the RC radio receiver.
I used a solder bridge to connect the components where I could. And where I couldn’t, I added some bridge wire.
If you read my DFPlayer article, you might note a difference in serial connections here. Originally, I had opted for a software-based serial connection from the Nano to DFPlayer using pins 10 and 11. I tried that arrangement here, but then the DFPlayer started locking up frequently when triggered from the radio. I thought there might be some timing/buffering issues at play, so I switched to the hardware UART, which requires use of the RX and TX pins on the Nano. And the problem went away. I’m still not convinced I understand why. I’ll save this investigation for another day. Using the RX and TX pins, however, means I can’t write new code to the Nano without disconnecting the DFPlayer first (e.g., desoldering). I shouldn’t need to do that unless I want to add new functionality down the road.
The Code
What follows is the code I wrote that ties everything together. Because we already saw how much of this works in the first two articles, I’m not going to explain the code line-by-line. I’ll instead give you a quick tour of the functions of interest, as well as a high-level overview of what they’re trying to accomplish.
#include "Arduino.h"#include "DFRobotDFPlayerMini.h"// These are connected to RC channels 5 and 6, respectively.staticconstint AUDIO_TRIGGER_PIN =2;staticconstint VOLUME_KNOB_PIN =3;// For serial communication to the DFPlayer.static DFRobotDFPlayerMini g_dfPlayer;// The total number of files on the DFPlayer's SD card.staticint g_totalFileCount =0;/**
* Checks to see if anything has changed on the audio trigger
* channel. And if so, plays the next sound.
*/void handleFilePlayback(){staticint lastTriggerValue =0;staticint lastFilePlayed =1;int pulseValue = pulseIn(AUDIO_TRIGGER_PIN, HIGH);if(pulseValue ==0)return;int audioTrigger =(pulseValue <1500)?0:1;if(audioTrigger != lastTriggerValue){
g_dfPlayer.stop();
delay(200);if(lastFilePlayed >= g_totalFileCount){// We've already played the last file. Time to loop back around.
g_dfPlayer.play(1);
lastFilePlayed =1;}else{
g_dfPlayer.next();++lastFilePlayed;}
delay(200);
lastTriggerValue = audioTrigger;}}/**
* Checks to see if anything has changed on the volume adjustment
* channel. If so, adjusts the volume on the DFPlayer accordingly.
*/void handleVolumeAdjustment(){staticint lastVolumeValue =0;int pulseValue = pulseIn(VOLUME_KNOB_PIN, HIGH);if(pulseValue ==0)return;int volumeKnob = map(pulseValue, 990, 2000, 0, 30);if(volumeKnob != lastVolumeValue){
g_dfPlayer.volume(volumeKnob);
lastVolumeValue = volumeKnob;}}/**
* Enters into an endless loop, flashed the specified
* LED at the specified rate.
*/void haltAndFlashLED(int ledId, int flashRateInMillis){bool ledOn =false;unsignedlong timeLastToggled = millis();do{unsignedlong currTime = millis();if((currTime - timeLastToggled)> flashRateInMillis){
digitalWrite(ledId, (ledOn ? HIGH : LOW));
ledOn =!ledOn;
timeLastToggled = currTime;}
delay(0);}while(true);}void setup(){// We'll use the built-in LED to indicate a communications// problem with the DFPlayer.
pinMode(LED_BUILTIN, OUTPUT);
digitalWrite(LED_BUILTIN, LOW);
pinMode(AUDIO_TRIGGER_PIN, INPUT);
pinMode(VOLUME_KNOB_PIN, INPUT);// Let's give the DFPlayer some time to startup.
delay(2000);
Serial.begin(9600);if(!g_dfPlayer.begin(Serial))
haltAndFlashLED(LED_BUILTIN, 1000);
g_totalFileCount = g_dfPlayer.readFileCounts(DFPLAYER_DEVICE_SD);if(g_totalFileCount <=0)
haltAndFlashLED(LED_BUILTIN, 500);// Valid values for volume go from 0-30.
g_dfPlayer.volume(20);// Plays the first file found on the filesystem.
g_dfPlayer.play(1);}void loop(){
handleFilePlayback();// Consumes any data that might be waiting for us from the DFPlayer.// We don't do anything with it. We could check it and report an error via the// LED. But we can't really dig ourselves out of a bad spot, so I opted to// just ignore it.if(g_dfPlayer.available())
g_dfPlayer.read();
handleVolumeAdjustment();// Consumes any data that might be waiting for us from the DFPlayer.// We don't do anything with it. We could check it and report an error via the// LED. But we can't really dig ourselves out of a bad spot, so I opted to// just ignore it.if(g_dfPlayer.available())
g_dfPlayer.read();}
#include "Arduino.h"
#include "DFRobotDFPlayerMini.h"

// These are connected to RC channels 5 and 6, respectively.
static const int AUDIO_TRIGGER_PIN = 2;
static const int VOLUME_KNOB_PIN = 3;

// For serial communication to the DFPlayer.
static DFRobotDFPlayerMini g_dfPlayer;

// The total number of files on the DFPlayer's SD card.
static int g_totalFileCount = 0;

/**
 * Checks to see if anything has changed on the audio trigger
 * channel. And if so, plays the next sound.
 */
void handleFilePlayback()
{
    static int lastTriggerValue = 0;
    static int lastFilePlayed = 1;

    int pulseValue = pulseIn(AUDIO_TRIGGER_PIN, HIGH);
    if (pulseValue == 0)
        return;

    int audioTrigger = (pulseValue < 1500) ? 0 : 1;
    if (audioTrigger != lastTriggerValue)
    {
        g_dfPlayer.stop();
        delay(200);
        if (lastFilePlayed >= g_totalFileCount)
        {
            // We've already played the last file. Time to loop back around.
            g_dfPlayer.play(1);
            lastFilePlayed = 1;
        }
        else
        {
            g_dfPlayer.next();
            ++lastFilePlayed;
        }
        delay(200);
        lastTriggerValue = audioTrigger;
    }
}

/**
 * Checks to see if anything has changed on the volume adjustment
 * channel. If so, adjusts the volume on the DFPlayer accordingly.
 */
void handleVolumeAdjustment()
{
    static int lastVolumeValue = 0;

    int pulseValue = pulseIn(VOLUME_KNOB_PIN, HIGH);
    if (pulseValue == 0)
        return;

    int volumeKnob = map(pulseValue, 990, 2000, 0, 30);
    if (volumeKnob != lastVolumeValue)
    {
        g_dfPlayer.volume(volumeKnob);
        lastVolumeValue = volumeKnob;
    }
}

/**
 * Enters into an endless loop, flashed the specified
 * LED at the specified rate.
 */
void haltAndFlashLED(int ledId, int flashRateInMillis)
{
    bool ledOn = false;

    unsigned long timeLastToggled = millis();
    do
    {
        unsigned long currTime = millis();
        if ((currTime - timeLastToggled) > flashRateInMillis)
        {
            digitalWrite(ledId, (ledOn ? HIGH : LOW));
            ledOn = !ledOn;
            timeLastToggled = currTime;
        }
        delay(0);
    } while(true);
}

void setup()
{
    // We'll use the built-in LED to indicate a communications
    // problem with the DFPlayer.
    pinMode(LED_BUILTIN, OUTPUT);
    digitalWrite(LED_BUILTIN, LOW);

    pinMode(AUDIO_TRIGGER_PIN, INPUT);
    pinMode(VOLUME_KNOB_PIN, INPUT);

    // Let's give the DFPlayer some time to startup.
    delay(2000);

    Serial.begin(9600);

    if (!g_dfPlayer.begin(Serial))
        haltAndFlashLED(LED_BUILTIN, 1000);

    g_totalFileCount = g_dfPlayer.readFileCounts(DFPLAYER_DEVICE_SD);

    if (g_totalFileCount <= 0)
        haltAndFlashLED(LED_BUILTIN, 500);

    // Valid values for volume go from 0-30.
    g_dfPlayer.volume(20);
    // Plays the first file found on the filesystem.
    g_dfPlayer.play(1);
}

void loop()
{
    handleFilePlayback();

    // Consumes any data that might be waiting for us from the DFPlayer.
    // We don't do anything with it. We could check it and report an error via the
    // LED. But we can't really dig ourselves out of a bad spot, so I opted to
    // just ignore it.
    if (g_dfPlayer.available())
        g_dfPlayer.read();

    handleVolumeAdjustment();

    // Consumes any data that might be waiting for us from the DFPlayer.
    // We don't do anything with it. We could check it and report an error via the
    // LED. But we can't really dig ourselves out of a bad spot, so I opted to
    // just ignore it.
    if (g_dfPlayer.available())
        g_dfPlayer.read();
}
Let’s start by looking at the setup() function. If you’ve read the previous two articles, this should look somewhat familiar to you. We start with initializing pins, the serial port, and the DFPlayer. Something new here is that we query the number of files on the SD card by calling the g_dfPlayer’s readFileCounts() member function. We then cache this value so we later know when to loop back to the first file. If we get a 0 for this value, something is wrong. In that case, we light up the LED and halt. Otherwise, we set the volume to a reasonable value and play the first file.
Next up, let’s look at the loop() function. It’s pretty simple. It just repeatedly calls handleFilePlayback() and handleVolumeAdjustment() over and over.
The handleFilePlayback() function is dedicated to checking whether or not the toggle channel value on the RC receiver has changed and reacting appropriately. If the toggle switch hasn’t moved, we do nothing. If it has moved, we then check to see if we’ve exceeded the number of files on the SD card. If we’ve already played all the files, we loop back around to file 1. If we haven’t, then we play the next file.
The handleVolumeAdjustment() function checks whether or not the volume knob on the radio has changed value and then reacts appropriately. If the knob value hasn’t changed, we do nothing. Otherwise, we map the PWM value range of 990 to 2000 to the DFPlayer’s volume range, which goes from 0 to 30, and then update the DFPlayer.
Conclusion
And that’s it! All I needed to do after writing the code to the Arduino was connect the speaker, RC receiver, and battery and give it a whirl.
Everything worked great, with one exception. I noticed if my sound board was too near the RC receiver, I started hearing noise in the speaker. For me, it was an easy fix. I just moved the RC receiver further away from the sound board. But if you have a tighter fit, you might need to experiment with shielding.