
 A few months ago, my wife and I were in the market for a new mattress. We popped into a local mattress store and spent the better part of the afternoon stretching out on almost everything they had. Before we left, we tried a really nice, we’ll-probably-never-afford kind of bed. It had controls for firmness and head and foot elevation. There were temperature and massage controls. Memory foam. There were even ground lights. That’s right. Ground lights! What a brilliant idea?!
We left the store empty handed. But the thought of those ground lights stuck with me. How fantastic it would be to have such a thing for a midnight pee run. Something bright enough to help you find your way, but dim enough as to not wake the blanket-stealing snore-machine sleeping next to you (To My Wife: Baby, your snores are like lullabies. Truly.). Of all of the things that fancy bed had, it was the ground lights I wanted the most.
So I decided to make my own, but with a couple of enhancements. I definitely wanted motion activated lights. Who wants to bother feeling around for a on/off button at 3 AM? I also wanted an adjustable brightness control. It’s hard to gauge how bright is too bright until you actually start to use it. I knew it would need to be tuned.
This blog describes my little bed-lights project. I’ll detail everything you need to know to build your own. Note that if you attempt this project, some of your parts will probably vary. As a result, you’ll need to adjust values of other components accordingly. I’ll try to help you out where I can.
[Disclaimer: If you choose to tackle this project, I take no responsibility for any bad things that might happen. If you wire something up wrong or take a shortcut that results in a fire, that’s not my fault. As the folks keen on legalese say, this blog is for informational purposes only.]
Parts List
Here is the parts list for the project
| Component | Qty | Approx. Price |
| ½” 10’ PVC Pipe (Home Depot or Lowes) | 2 | $5 |
| ½” PVC End Caps (Home Depot or Lowes) | 4 | $1.50 |
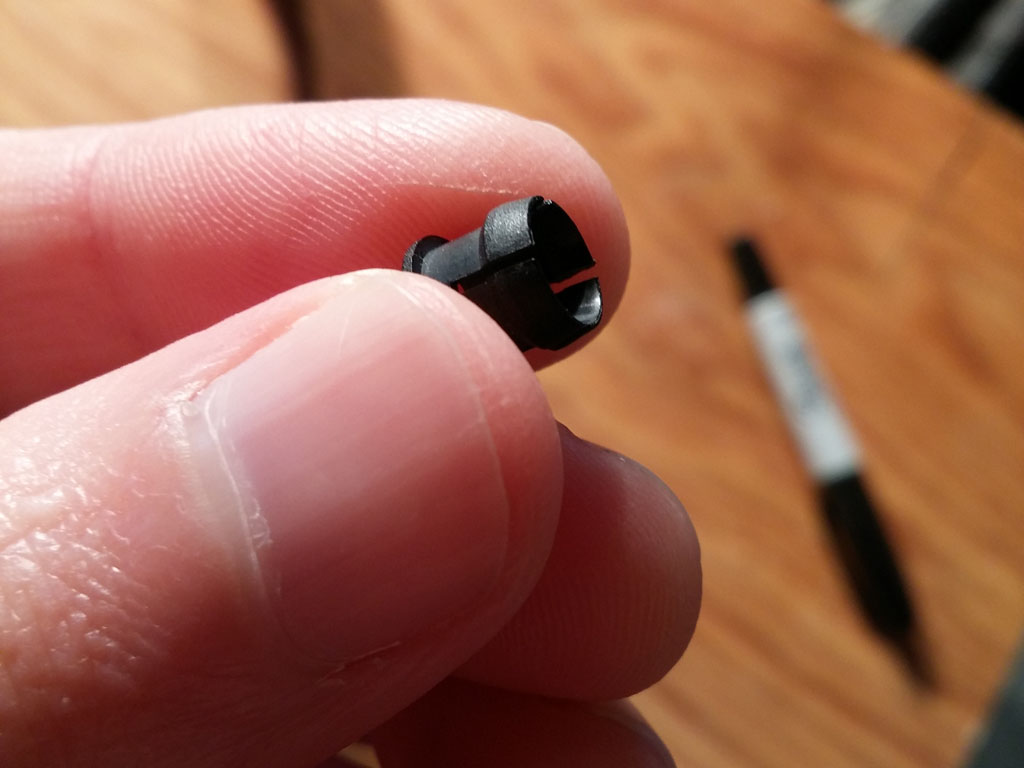
| LED Holders, 5mm | 12 | $1.50 |
| 2.1mm Female DC Power Barrel Connectors, Panel Mount | 5 | $15.00 |
| 2.1mm Male DC Power Connectors | 4 | $6.50 |
| 20 AWG wire | 1 Spool, 100ft. | $10.00 |
| 20 AWG 25′ Hook-Up Wire(For convenience in building power cables. Not entirely necessary. You could just use wire from the previous item. You’ll definitely have plenty of leftover if you buy 100′. ) | 1 | $4.30 |
| Rustoleum Flat, Black Spray Paint | 1 | $6.00 |
| Heat Shrink Tubing | 1 Pack (Won’t Use It All) | $7.00 |
| 9V 2.1mm wall wart, at least 500mA | 1 | $11.00 |
| 500mA Fuse | 1 | $2.20 |
| Fuse Holder | 1 | $1.00 |
| White LEDs, 5mm 3Vf (Mine came from EBay in a 300pcs assortment pack) | 12 | $0.25 |
| 330 Ohm Resistors | 14 | $1.40 |
| 2.2k Ohm Resistors (Specific to the current needs of my light rails – see notes below on how you might need a different value) | 2 | $0.20 |
| 2N3904 Transistors (NPN) | 2 | $0.50 |
| 1N4001 Diodes | 2 | $0.50 |
| 1 M Ohm Potentiometer | 1 | $5.00 |
| Adafruit PIR Sensor | 2 | $20.00 |
| Perfboard | 1 | $3.00 |
| Enclosure for Controller | 1 | $6.00 |
| Enclosures for PIRs and lids | 2 | $3.50 |
| Velcro Straps | 1 Pack | $4 |
| Velcro Tape | 1 Pack | $5 |
Total Project Cost: ~$120.00
Granted, this is just an estimate. All of the passive components I had laying around. You might find much of what you need by poaching old busted electronics.
Overview
There are 3 basic components to the bed lights. The first, and most obvious one, is the pair of light rails – one for either side of the bed. The second component is the motion sensor (PIR). There are two of these as well. The third component is the controller box. This is where power gets distributed, motion sensor input is handled, and lights get switched on. It’s also where the control knob for the brightness control lives. The basic configuration is like so.
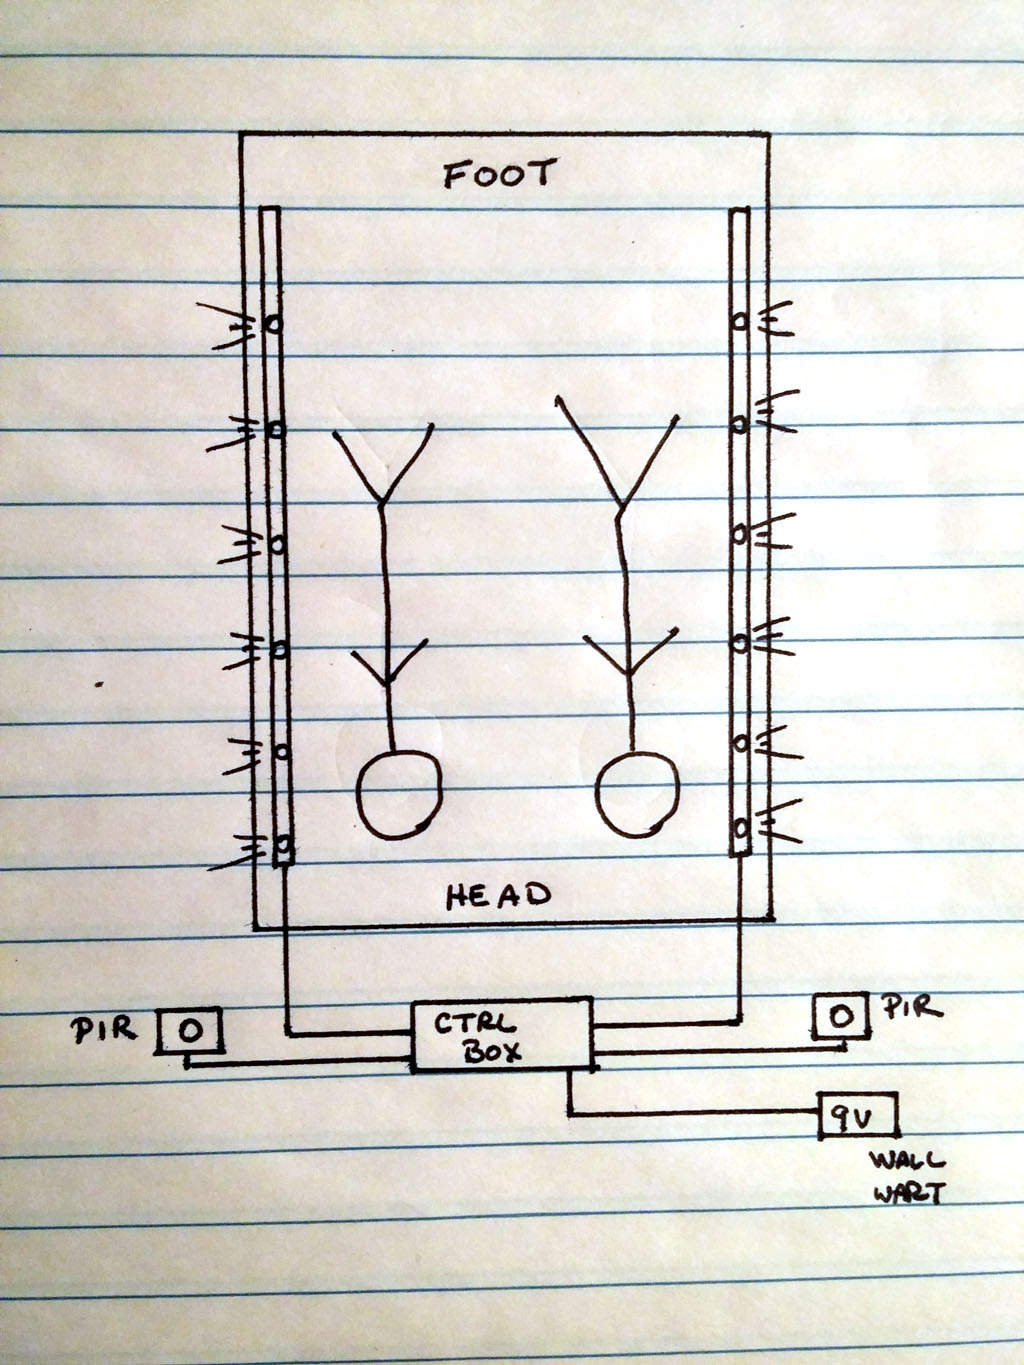
Something that’s not obvious from the sketch is that each PIR controls both light rails. If one of the PIRs is triggered, both rails light up. And if both PIRs are triggered at the same time, both rails still light up.
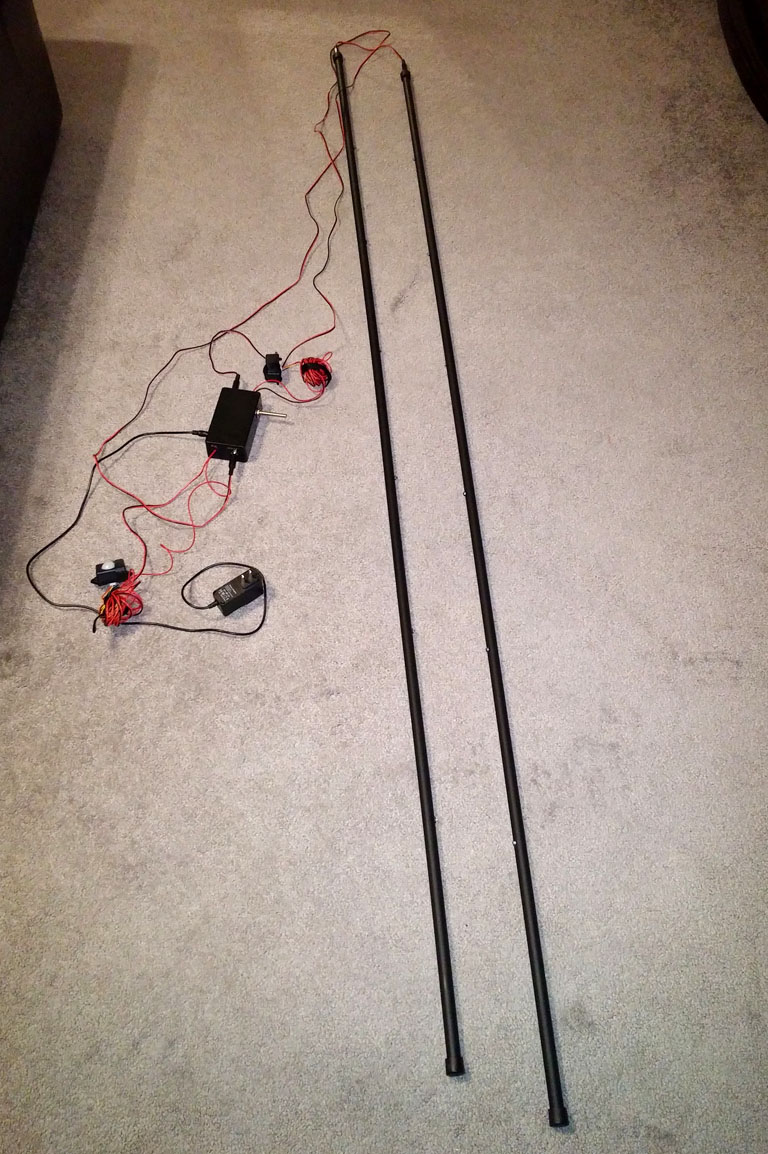
Building the Light Rails
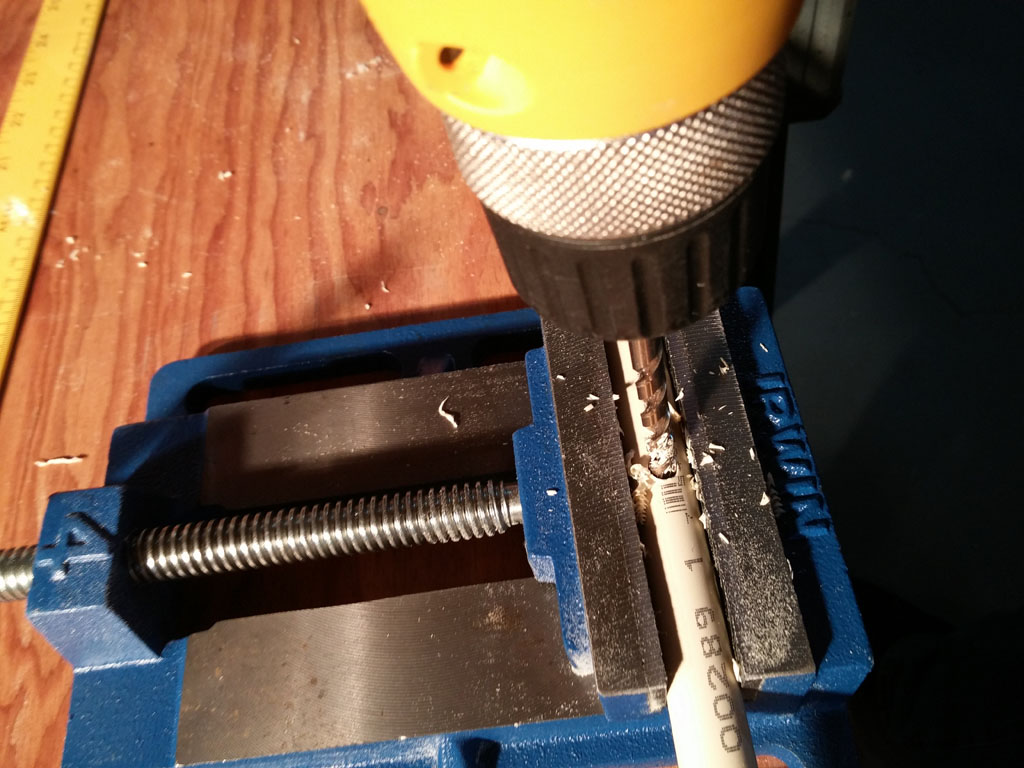
The first step to building the light rails is cutting the PVC pipe down to size. The ½” pipe that I bought came in 10 ft. lengths. That’s way too long for my bed. So, using a hacksaw, I cut both pieces down to 7ft.

Next, I drilled 6 evenly spaced holes for the LED holders in each pipe. The trick here is to initially start with a small drill bit and then work up to larger ones, testing the LED holders as you go. It was important that the LED holder was able to pop in, feel somewhat snug, and then pop out easily again.
For each pipe, I planned to cap both ends. But in the cap for one end, I drilled a center hole large enough to accommodate one of the female 2.1mm barrel connectors. This is where power will be supplied to the rail. Actually mounting the connectors and attaching the end caps should happen last, after the rail is wired up and ready to report for duty.
At this point, I painted both the pipes and the end caps by applying a couple of coats of flat black Rustoleum spray paint.
Next up – the wiring.
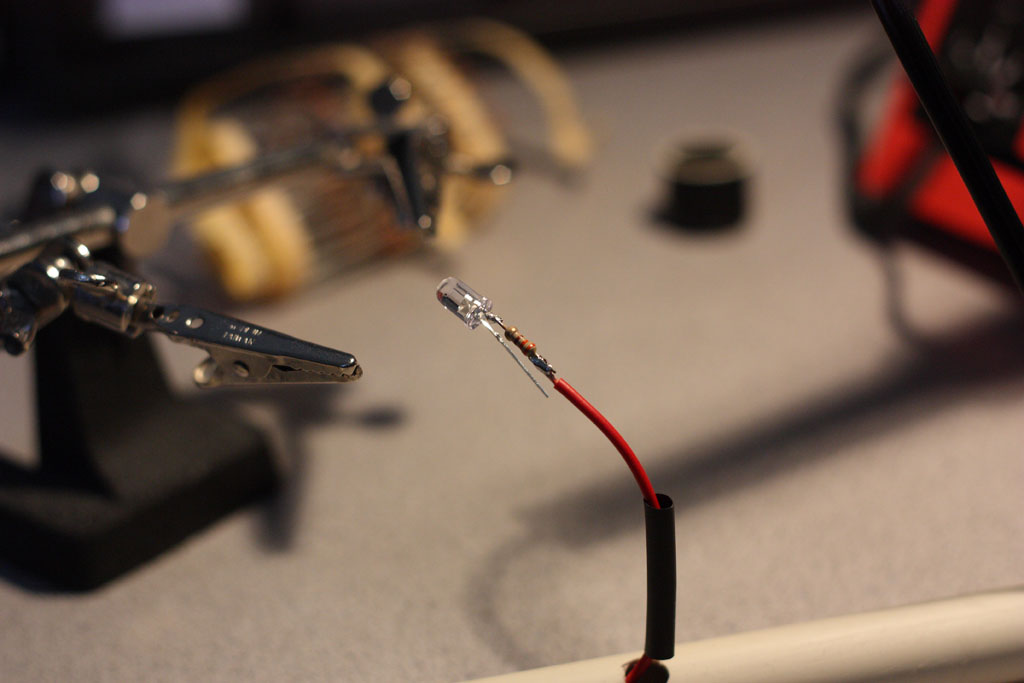
Each LED on the rail has an associated 330 ohm resistor and each LED/resistor combination is wired in parallel. If one LED dies, the rest will continue to light up. As shown in the photo below, I merely soldered a resistor to one of the legs of the LED and then connected wire as appropriate (Note: The PVC in the photo below is unpainted. This photo was taken as I was still experimenting.) I then tidied things up with heat shrink tubing.
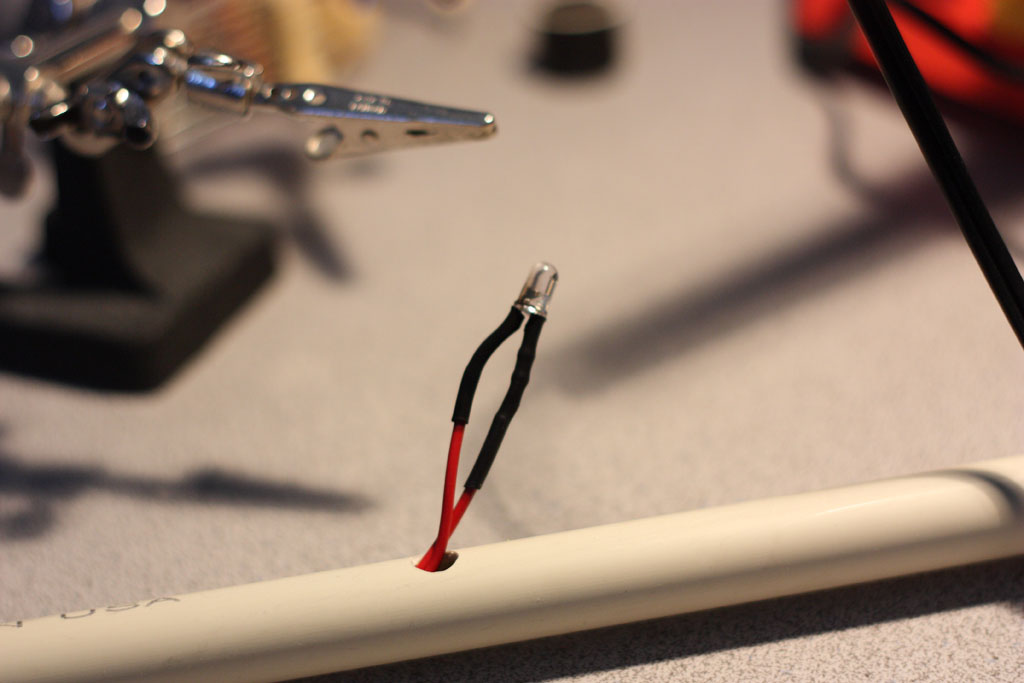
I should point out that it’s much easier to snake the wire through the pipe a segment at a time between holes and wire up the LEDs in-place, than it is to try to wire up everything outside of the PVC pipe and then to try to snake the whole thing through the PVC in one fell swoop. I learned this quickly. Trying to assemble everything outside of the PVC pipe just leads to headaches as you try to fish the LEDs/resistors out through the holes. It’s time consuming and not worth it.
It’s important to make sure the LEDs are wired up properly. They have polarity. And because we’re wiring things up in parallel, 5 of the 6 LED combinations will be connected to 4 wires. If you’re having trouble visualizing this, here’s a diagram to help you out. 5 of the 6 LED/resistor pairs have an incoming positive connection as well as an outgoing positive connection. The same is true of the negative connections. Only the last LED/resistor pair has single connections for the positive and negative terminals.

After the LEDs were wired up, I tested each rail with a nine volt battery to ensure everything lit up. I then popped the LEDs in their holders, put a dab of superglue on each holder, and pushed everything down in their holes. Some LED/resistors didn’t appreciate being pushed down into tight quarters, so I tested the LEDs again as I went along to ensure I didn’t break something or short a connection.
Next up, the DC power connectors. I soldered the leads appropriately to the power connectors, being careful to get the polarity right. A multimeter is handy for that. If you’re uncertain what’s negative and what’s positive, plug in your power supply directly to the jack and find out. If you don’t have a multimeter (God, help you), you can always test using another LED resistor pair separate from your light rails. If everything is connected up properly, the LED should light right up. If it’s backwards, the LED will go up in smoke or won’t light at all.
With the jacks wired up, I mounted them into the PVC end caps and superglued all caps to the pipes. The light rails were finished.
Building the Controller
As mentioned before, the controller serves three purposes – 1) Distribute power to all the other components. 2) Switch on the lights when the motion sensors are triggered. And 3) provide a mechanism that allows me to adjust the brightness of the light rails. All three of these goals are accomplished in the following circuit

Click to Enlarge
How It Works
Power is distributed to the light rails and PIRs after passing through the 500mA fuse. The fuse is there just in case we get a short anywhere. It would probably be better to go with a fuse closer to the current rating of the actual circuit. 500mA is what I had on hand.
The negative sides of the light rails are connected to the collector of an NPN transistor. In my configuration, the transistor works like a switch. When the appropriate voltage is applied to the transistor’s base, current will be allowed to flow from the collector, through the emitter, and on to ground. This will allow the light rails to light up.
I should note that transistors could have been replaced with simple relays. If you prefer to go that route, you won’t need the resistors attached the the transistors’ bases. However, relays are clicky. And this is a bed/sleep related application. The sound of relays might be a little annoying in the middle of the night.
Determining the resistor values for the transistors’ bases depends entirely on the power needs of your light rails. On paper, each rail draws 109mA each at 9V. The magic formula for determining the base resistor value is:
R = switching_voltage * Hfe / (1.3 * load_current)
The switching voltage is the signal voltage from the PIRs (3.3v). I’ll have more to say about the PIRs shortly. I have to confess, the Hfe of a transistor is somewhat of a magic number to me. Technically, it’s the ratio of the load current to the base current. Given I didn’t know my base current, I wasn’t quite sure how to calculate this. Most folks on the Interwebs claim that 100 is a good number to use for the 2N3904. So that’s what I went with. Plugging the numbers into the formula gives us:
R = 3.3V * 100 / (1.3 * 0.109A)
R = Approx. 2329 Ohms
I didn’t have such a resistor in my Box-O-Electronic-Thingamabobs, so I went with a combination of a 2.2k Ohm and a 330 Ohm to get me close. Better to be over than under (I think).
The diodes in the circuit are used to protect the signal pins of the PIRs. These may not actually be needed. I’m not entirely sure. Without them, I worried that if one PIR goes high and the other is low, a voltage would be placed across the signal pin of the low PIR and damage it. Would this actually happen? No clue. But I decided to play it safe and add diodes to the mix. The diodes allow current to flow in only one direction – out through the transistor.
The 1M Ohm potentiometer is used to limit the current that can pass through the transistor’s base. This component allows the transistor to work like an amplifier as well as a switch. By decreasing the amount of current through the transistor’s base pin, we decrease the amount of current that can flow in from the light rails and out through the emitter. Turning the potentiometer clockwise increases the resistance on the transistor’s base. Increasing resistance lowers the current. And, voila, we have an adjustable dimmer.
Assembling the Controller
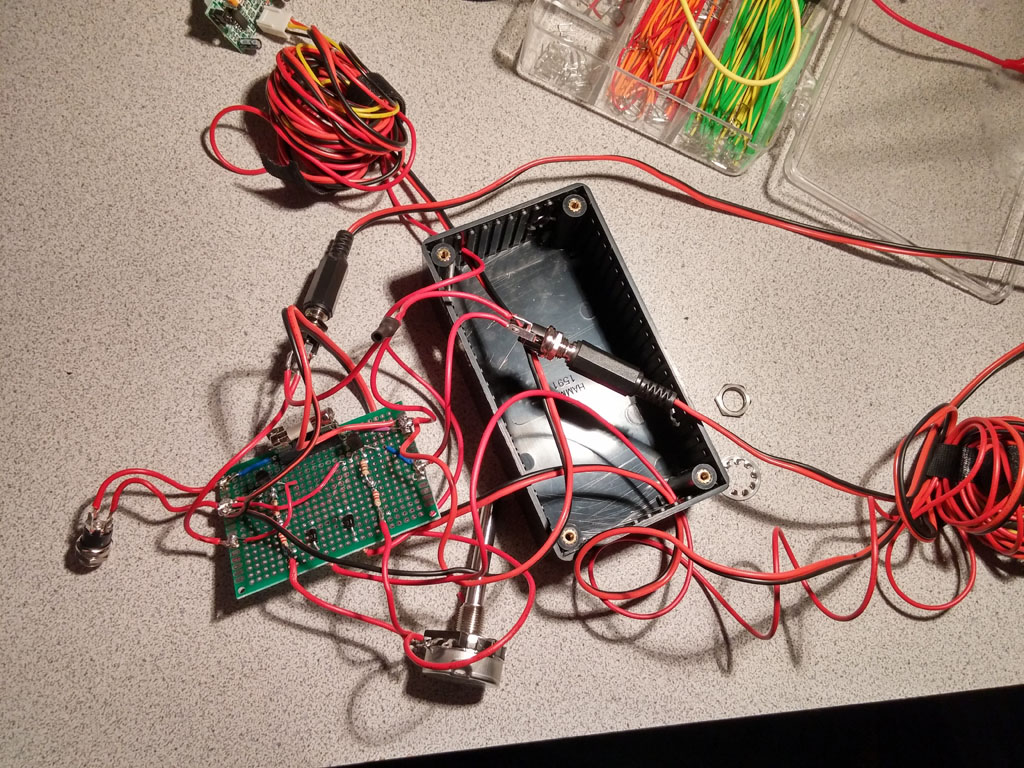
With regards to the circuit, I can’t really give much advice. Just follow the circuit shown above and arrange the components in a way that works for you. I used a perfboard without any traces. I connected components using a combination of jumper wires and solder bridges. None of the power connectors, nor the potentiometer were mounted directly to the perfboard. If I had a perfboard that was perfectly fitted for my enclosure I might have gone that route, but I didn’t. So those components were connected using wire.
As for the enclosure, I strongly recommend planning out the component positioning before going anywhere near it with a drill. It’s EXTREMELY frustrating to drill a bunch of holes only to discover that there’s not enough space inside the enclosure to fit everything safely. Space on the inside fills up quickly.

A fellow by the name of John Cooper has an excellent YouTube tutorial on using Sketchup to layout enclosures for guitar effects pedals. I do something similar for my enclosures using 3DS Max. I encourage you to check out John’s video, learn something new, and apply this practice to all of your enclosures. It’ll save you a world of pain.
I discuss the PIR sensors below. But I should mention here that I didn’t have any compatible connectors on hand that I could mount onto the enclosure. The PIRs require three pins – power, ground, and signal. All of my connectors are of the two wire variety. So I just drilled a couple of holes in the side of the enclosure for the PIR cables and soldered them directly onto the perfboard. As a result, the PIR cables are the only cables that aren’t detachable from the controller enclosure. I may fix this at a later time. Or I may not. It’s not that big of a deal.
Motion Sensors (PIRs)
The motion sensors I selected for this project are $10 PIR sensors from Adafruit. PIR sensors detect changes in infrared light. You can find them at just about any electronics outlet. The Adafruit version is interesting in that it has 2 adjustment pots – one for sensitivity and one for a time delay. Adafruit’s website recommends these things be powered at 5v, but claims that 9v is an acceptable upper limit. Since I’m running everything else off of 9v, that wins by default. There’s always a risk I’ll burn these things out quicker. Time will tell, I guess. If you’re following along with my project and you’d rather go with the suggested 5v, just create a voltage divider out of 2 resistors.
The sensitivity adjustment seems to correlate to range. The most sensitive setting comes in at around 20 ft.
The time delay adjustment affects how long the signal will remain high after the PIR has stopped detecting motion. I’ve adjusted both of mine to be around 15 seconds. By using two sensors (one for either side of the bed), this gives a person plenty of time to get from one side of the bed to the other and out of the room before the light rails shut off.
The Adafruit PIRs come with a 1ft long 3-wire 26 AWG cable attached to a 2510 Molex connector. 1 ft. is obviously not long enough, so I fashioned extension cables out of leftover wiring from the light rails and some heat shrink tubing. If you want to get fancy, find yourself some more 2510 Molex connectors for your controller enclosure so you can have detachable PIR cables. I didn’t have any available. As I said before, I just soldered the cables directly to the controller board. Not pretty, but it works.
The enclosures I used for the PIRs weren’t ideal, but they were the best I could find. Here’s a picture of what they look like.
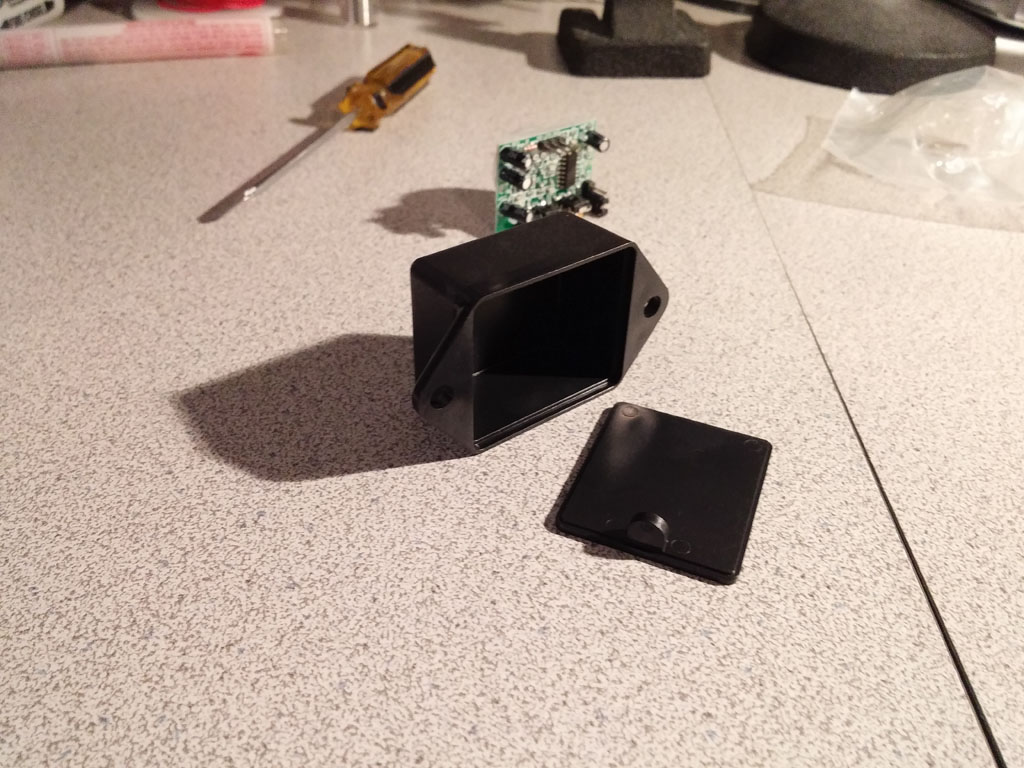
With a stepper drill bit, I drilled holes in the front of the enclosure large enough to accommodate the PIR sensor. A used a dremel to carve out a hole in the back just big enough for the Molex connector. Once everything was connected, I taped the thing shut.
Light Rail Cables
The last thing you’ll need to construct is a set of power cables for the light rails. You might be able to find some long 2.1mm male/male cables online if you’d rather not fuss this step. But creating power cables for the light rails is probably the easiest part of the entire project.
For a single cable, all you need are 2 2.1mm male DC connectors and some 20 AWG wire. The connectors unscrew to reveal terminals for soldering. Make sure you wire one end of the cable up the same way as you do the other end (negative to negative, positive to positive).
Installation
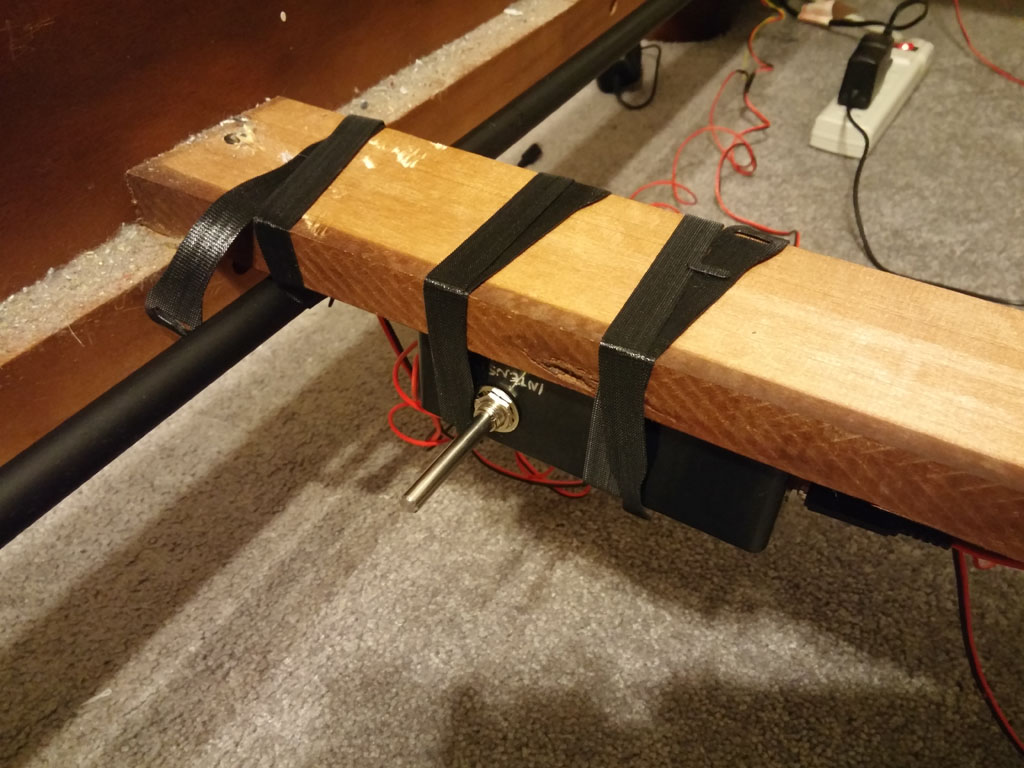
Attaching the setup to the bed involved lots and lots of velcro. Both the controller and the light rails were attached with velcro straps. The motion sensors were attached to the footboards using velcro tape.
The light rails were angled such that the light pointed down and away from the bed. The PIRs were mounted near the headboard, but angled so they pointed towards the footboard and slightly out. Hopefully that shows in the photos below.


Conclusion
All in all, this is a pretty simple project. And a lot of fun. We’ve been using these bed lights for well over a week now. I think I can say this project has been a tremendous success. The brightness level took a little tuning. It’s amazing how bright light can seem once your eyes adjust to darkness. It took three nights of dimming the LEDs before I found a brightness level that didn’t wake one of us up. But I found it. No more feeling around for the cell phone to light my way to the bathroom in the “wee” hours (cue rimshot).
Something I hadn’t anticipated, but worth mentioning, is the psychological effect of having the lights switch on in the middle of the night when they shouldn’t have. Ghosts? Mice? Dust bunnies on the move? It stirs up anxiety, which doesn’t bode well for the sleep-deprived mind. Just be aware that if you’re sensitive to such things, you’ll probably need to adjust the sensitivity of the PIRs (glad we only taped those shut :-)).
Some specs you might find interesting. When idle (the light rails off), I measured the current draw at around .1mA. That’s barely anything. With the lights on at full brightness, the current draw is around 130mA. That’s almost half of my original full-on value for both rails. I’m sure there was a fudge factor in my transistor base calculation. The lights could have been a bit brighter. But that’s fine. Even at max power now, the light rails are too bright to be practical.